Essential Tips for Maintaining Your RV Glass After Repair
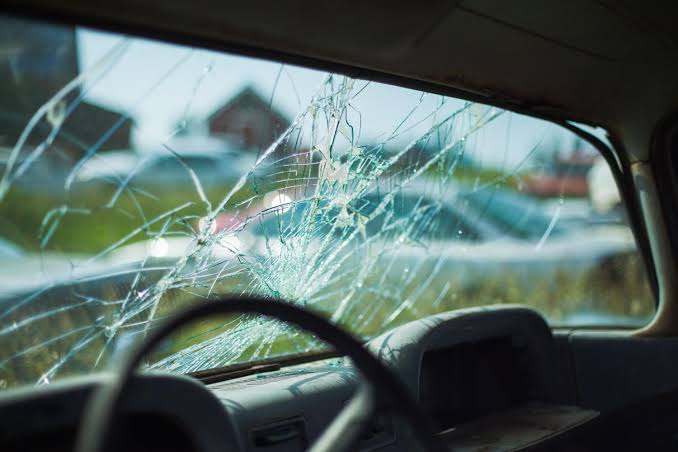
Getting your RV glass repaired is a relief, but the job doesn’t end when the technician packs up the tools. The way you care for the glass afterward can make a real difference in how well it performs over time.
A few simple habits—especially during the first few days—can help protect the repair, prevent avoidable damage, and keep your windshield and windows clear for the road ahead.
Why Post-Repair RV Glass Care Matters
RV glass deals with a lot of exposure.
Your motorhome may spend hours traveling at highway speeds, sitting under strong sunlight, passing through rain, and driving over rough roads. The windshield and windows also experience vibration and repeated temperature changes.
After a repair, the glass and surrounding materials need appropriate care while everything settles into its normal operating condition.
This is particularly important after windshield replacement, because the bonding system used during installation needs adequate time to cure according to the manufacturer’s and technician’s instructions.
Even after the initial curing period, good maintenance remains important.
1. Follow Your Technician’s Instructions First
Every RV glass repair is slightly different.
A technician may give you specific instructions about when you can drive, wash the RV, operate a particular window, or remove temporary materials.
Those instructions should take priority over general maintenance advice.
If you’re unsure about something, call the repair provider before taking action.
Ask About These Details
Before the technician leaves, confirm:
- When the RV can be driven normally
- When it is safe to wash the vehicle
- Whether the windows should remain closed for a certain period
- Whether temporary tape or protective materials should stay in place
- When normal windshield wiper use can resume
- Whether there are any special post-repair precautions
A quick conversation can prevent an accidental mistake.
2. Give a Newly Replaced Windshield Time to Cure
Windshield replacement commonly involves a bonding adhesive that needs time to cure.
The exact safe-drive-away time depends on the adhesive, temperature, humidity, vehicle, and manufacturer’s requirements.
Don’t assume that because the windshield looks firmly installed, it has reached its full required curing condition.
If your technician says to wait before driving, follow that instruction.
Why Rushing Can Be a Bad Idea
The windshield needs to remain correctly positioned while the bonding material reaches the required strength.
Driving too soon can expose the installation to movement, vibration, and other forces before the adhesive has adequately cured.
Your glass professional should tell you when the vehicle is ready to return to normal use.
3. Be Gentle When Cleaning the Glass
Once the repair has been completed and the technician says cleaning is appropriate, use a gentle approach.
Avoid aggressive scrubbing around repaired areas and newly installed glass.
Use:
- A suitable automotive glass cleaner
- A clean microfiber cloth
- Gentle wiping motions
- Fresh cleaning materials rather than dirty rags
Dirt and grit can act like abrasive particles when rubbed against glass.
Avoid Harsh or Abrasive Materials
Don’t use rough sponges, abrasive pads, or tools that can scratch the surface.
The windshield may look tough, but repeated abrasive cleaning can gradually affect optical clarity.
For RV owners, keeping a dedicated microfiber towel in the vehicle can be a simple way to encourage better glass-cleaning habits.
4. Keep Your Windshield Wipers in Good Condition
Wiper blades have direct contact with the windshield, so their condition matters.
Old blades can become hard, cracked, or contaminated with dirt. Instead of smoothly moving water away, they may drag debris across the glass.
That can produce streaks and contribute to surface wear.
Signs Your Wipers Need Attention
Consider replacing the blades if you notice:
- Streaks after wiping
- Skipping across the glass
- Chattering sounds
- Uneven contact
- Cracked rubber
- Persistent dirty areas
Good wipers aren’t just about keeping the windshield clean. They help maintain clear visibility when rain arrives unexpectedly.
5. Don’t Run Dry Wipers Across a Dirty Windshield
This is an easy habit to overlook.
If the windshield is covered with dry dust or sand, switching on the wipers immediately can move those particles across the glass.
Before using the wipers, spray the appropriate washer fluid when possible.
If there is heavy dirt or mud, clean the windshield manually using suitable materials first.
This small step can reduce unnecessary friction and surface wear.
6. Inspect Your RV Glass Before Long Trips
A quick inspection should become part of your pre-trip routine.
You don’t need special equipment.
Simply walk around the RV and look closely at the windshield and windows.
Check for:
- New chips
- Hairline cracks
- Scratches
- Edge damage
- Fogging between dual panes
- Damaged seals
- Loose trim
- Water stains around windows
Early detection gives you more time to arrange professional service before you’re several hundred miles from home.
7. Pay Attention to Small Chips After Repair
A repaired windshield can still receive new impact damage.
Driving on highways exposes the RV to gravel, stones, and other road debris.
If a new chip appears, don’t assume it’s harmless because the windshield was recently repaired.
Have the new damage assessed.
The fact that one area was previously repaired doesn’t mean another impact cannot create a separate problem.
8. Maintain a Safe Following Distance
Road debris is a major source of windshield damage.
Large trucks, construction vehicles, and vehicles traveling on gravel-covered roads can throw stones toward your RV.
You can’t control everything that comes off the road, but increasing your following distance can reduce some exposure.
This is particularly useful on highways and roads where loose gravel is common.
Be Extra Careful Around Construction Zones
Construction areas often contain loose stones and other debris.
Slow down when appropriate, maintain a reasonable distance, and stay alert for material falling or being thrown from vehicles ahead.
A few extra seconds of caution can be easier than dealing with another windshield repair.
9. Don’t Ignore Changes in Windshield Visibility
A windshield can remain physically intact while becoming increasingly difficult to see through.
Watch for glare, distortion, scratches, haze, and pitting.
These problems can become especially noticeable during:
- Sunrise
- Sunset
- Night driving
- Rain
- Bright headlights
- Direct sunlight
If your vision through the windshield has changed, arrange an inspection.
Clear visibility is one of the most important functions of automotive glass.
10. Check the Window Seals Regularly
The glass isn’t the only component that deserves attention.
RV window seals protect the interior from rain and outside air. Over time, exposure to sunlight, temperature changes, and weather can cause sealing materials to deteriorate.
Inspect the area around repaired or replaced windows periodically.
Look for:
- Gaps
- Cracking
- Separation
- Hardened seal material
- Water stains
- Damp interior trim
If you notice moisture, find the source promptly.
Don’t Automatically Add More Sealant
Seeing a small gap may tempt you to apply household sealant immediately.
That isn’t always the best solution.
The visible gap might be a symptom of another issue involving the frame, installation, or existing seal.
A professional inspection can help identify the actual cause.
11. Protect Dual-Pane RV Windows
If your RV has insulated dual-pane windows, watch for moisture between the panes.
A clear window should not normally develop persistent condensation inside the sealed space.
If you notice:
- Fogging
- Cloudiness
- Condensation between panes
- A permanently hazy appearance
the insulating seal may have failed.
Cleaning the inside and outside surfaces won’t remove moisture trapped between the panes.
Professional evaluation can determine whether the insulated glass unit can be serviced or needs replacement.
12. Be Careful With Temperature Extremes
RVs often experience dramatic temperature changes.
They can sit in direct sunlight during the afternoon and cool significantly overnight.
Healthy automotive glass is designed to handle normal environmental conditions, but damaged glass can be more vulnerable to stress.
Avoid deliberately applying extreme hot or cold water to glass, particularly if you notice an existing chip or crack.
Instead, let the glass change temperature naturally whenever possible.
13. Park Your RV Strategically During Severe Weather
You can’t always choose where your RV is parked, but when options exist, think about glass protection.
During severe storms, areas under unstable trees may present a risk from falling branches.
Open areas may expose the RV to hail and flying debris.
Whenever practical, choose a secure location appropriate for the weather conditions.
After a storm, inspect all windows and the windshield before setting off.
14. Avoid Slamming RV Doors
This may sound like a small detail, but excessive force isn’t ideal for an RV.
Repeatedly slamming doors and compartments can create unnecessary vibration throughout the vehicle.
You don’t need to close everything delicately, but developing a habit of closing doors firmly without excessive force is sensible—especially when the RV has recently undergone glass work.
15. Keep the Interior Area Around Windows Dry
Water problems aren’t always visible from outside.
Check the interior trim around windows after heavy rain.
If you find dampness, staining, or an unusual odor, investigate it rather than allowing the problem to continue.
Persistent moisture can eventually affect materials around the window opening.
The sooner a leak is addressed, the easier it may be to prevent secondary damage.
16. Don’t Put Pressure on Repaired Glass
Avoid leaning heavy objects against a repaired window or windshield.
If you’re cleaning the RV or working near the glass, don’t place ladders, tools, equipment, or other heavy items against it.
This is particularly important around recently repaired or replaced components.
Treat the repaired area carefully until you’re confident that everything is operating normally.
17. Keep Records of Your RV Glass Work
This is a surprisingly useful habit.
Keep information about:
- Repair dates
- Replacement dates
- Glass specifications
- Service provider
- Warranty information
- Adhesive or installation details
- Any special maintenance instructions
If you need additional work later, these records can give the technician useful background.
It can also help you remember when particular glass components were replaced.
A Simple Post-Repair Maintenance Routine
You don’t need a complicated maintenance schedule.
Before Every Long Trip
Check for new cracks, chips, scratches, fogging, and seal problems.
Every Few Weeks
Clean the glass properly and inspect the wipers.
After Heavy Rain
Look for moisture around the window frames and interior trim.
After Severe Weather
Inspect all exterior glass for impact damage.
After a Long Highway Journey
Look for fresh stone chips and other road debris damage.
This routine takes only a few minutes but can help you stay ahead of small problems.
A Real-Life Example
Imagine an RV owner who has just had a windshield replaced before a long vacation.
The technician explains that the adhesive needs a specific period before normal driving. The owner follows the instructions, avoids unnecessary washing during the recommended period, and checks the windshield before leaving.
During the trip, a small stone strikes the passenger side.
Instead of ignoring it, the owner takes a photo and arranges an inspection at the next convenient opportunity.
That response is much better than waiting until a crack spreads across the windshield during the middle of the trip.
The lesson is simple: post-repair care isn’t complicated. It mostly comes down to paying attention.
When to Call an RV Glass Professional Again
Contact a professional if you notice:
- A new windshield chip
- A spreading crack
- New water leaks
- Persistent fogging between dual panes
- Significant scratches
- New wind noise
- Loose molding
- Unusual glass movement
- Problems that appear shortly after installation
Don’t attempt complicated glass repairs yourself.
RV windshields and specialized windows can involve safety-critical installation methods, so professional evaluation is the safer choice when damage or installation concerns appear.
For RV owners who need professional glass assistance or want to research available services, https://rvglassgurufl.com/ can be a useful resource.
Final Thoughts
Maintaining RV glass after repair doesn’t require hours of work.
The biggest difference comes from a few consistent habits: follow the technician’s post-repair instructions, give new installations the required curing time, keep the glass clean, maintain your wipers, inspect seals, watch for new damage, and address problems early.
Your RV’s windshield and windows have to handle thousands of miles, changing weather, road debris, and constant vibration.
Take a few minutes to inspect them regularly. A small chip or seal problem is much easier to deal with when you notice it early rather than after it becomes a travel-stopping problem.


Post Comment